 on the job
Getting started with Flex
Flex is one system for the whole company: the customer, the job, the schedule, the parts, the invoice and the payment all live in one place. This walkthrough gets a new company from sign-in to first paid invoice in about fifteen minutes. Screens shown use the sample company Copperline Heating & Air — its customers, addresses and phone numbers are invented.
First: the setup checklist
Where: Dashboard, top card — appears until you finish or dismiss it
The first time you sign in, Flex shows a short checklist on your dashboard. It tracks itself: each item ticks off when the thing exists, so you never mark anything done by hand. Nothing on it is mandatory — you can invoice a customer with a bare account — but each item makes the day-to-day work faster.
| Step | What it does | Required? |
|---|---|---|
| Set your business defaults | Tax rate, payment terms, reply-to email, and what your job sheet looks like | Optional |
| Add the items you sell | Your parts and services so a job is a pick, not a retype | Optional — you can free-type lines |
| Add labor rates | Hourly and flat rates so estimates price themselves | Optional |
| Add a stock location | Van, shop or warehouse, so stock has somewhere to live | Optional — only if you track inventory |
| Write your first ticket | A real customer and a real job | This is the point |
Tip: Nothing is lost by skipping. Every step on the checklist stays available from Settings after you've dismissed it.
Sign in
Where: app.flexonthejob.com — or the desktop app, which is the same thing installed locally
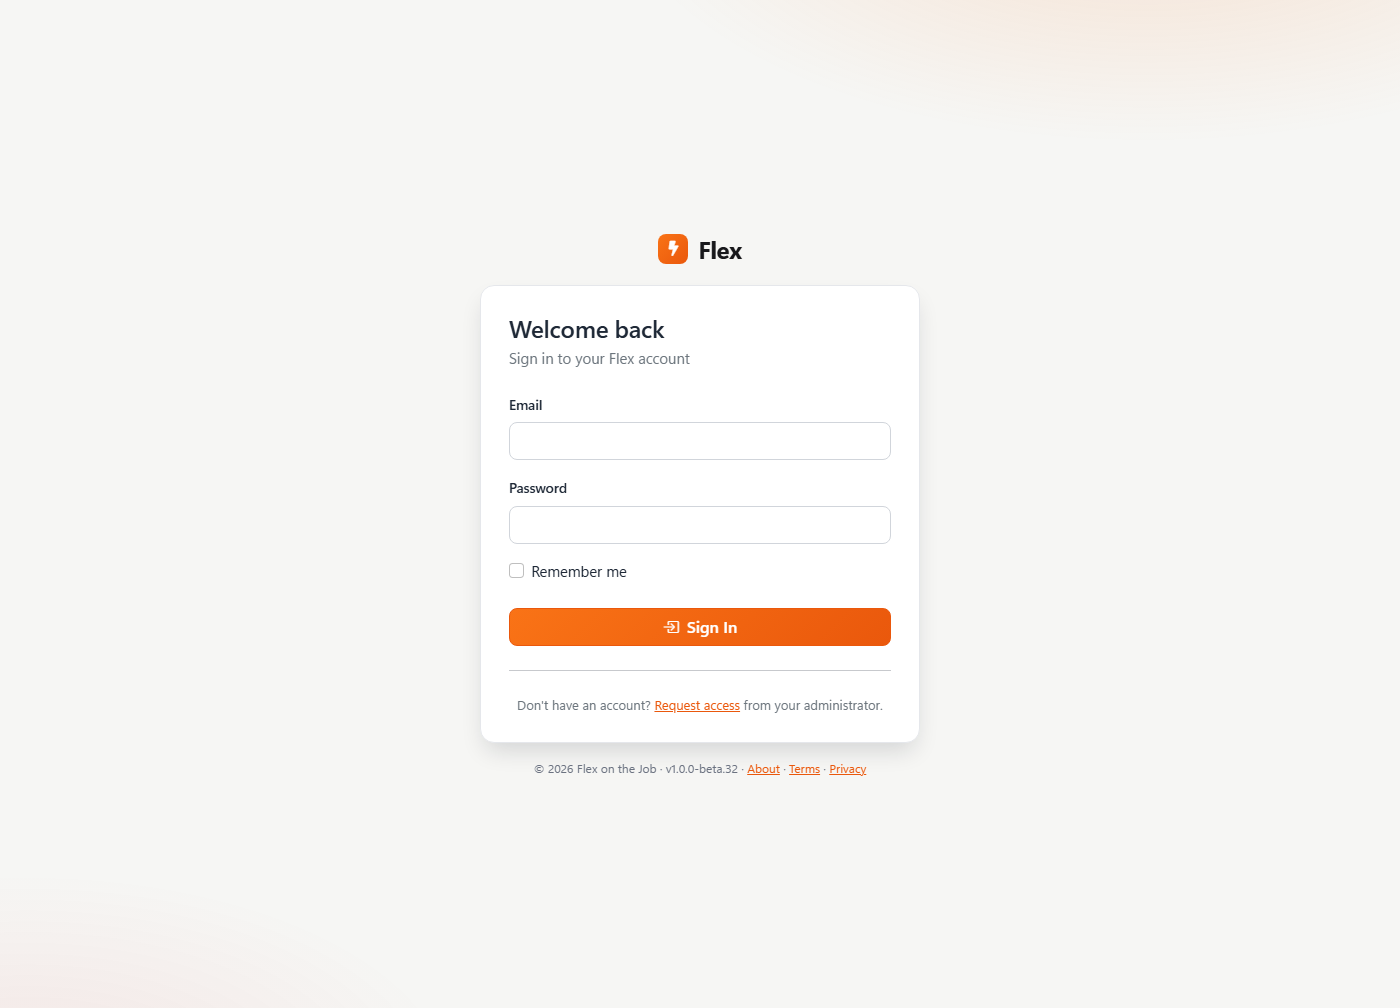
Sign in with the email and password from your welcome email. Flex is one app that runs in three places — the browser, a Windows desktop app that keeps working with no internet, and a phone app for the crew — and one sign-in works everywhere.
Read the dashboard
Where: Home — the first thing you see after sign-in
The dashboard is a to-do list for the company, not a chart gallery. Every tile is a count of something that needs a person: estimates awaiting approval, jobs on today's schedule, invoices past due, stock below its reorder point. Click a tile to go to that list.
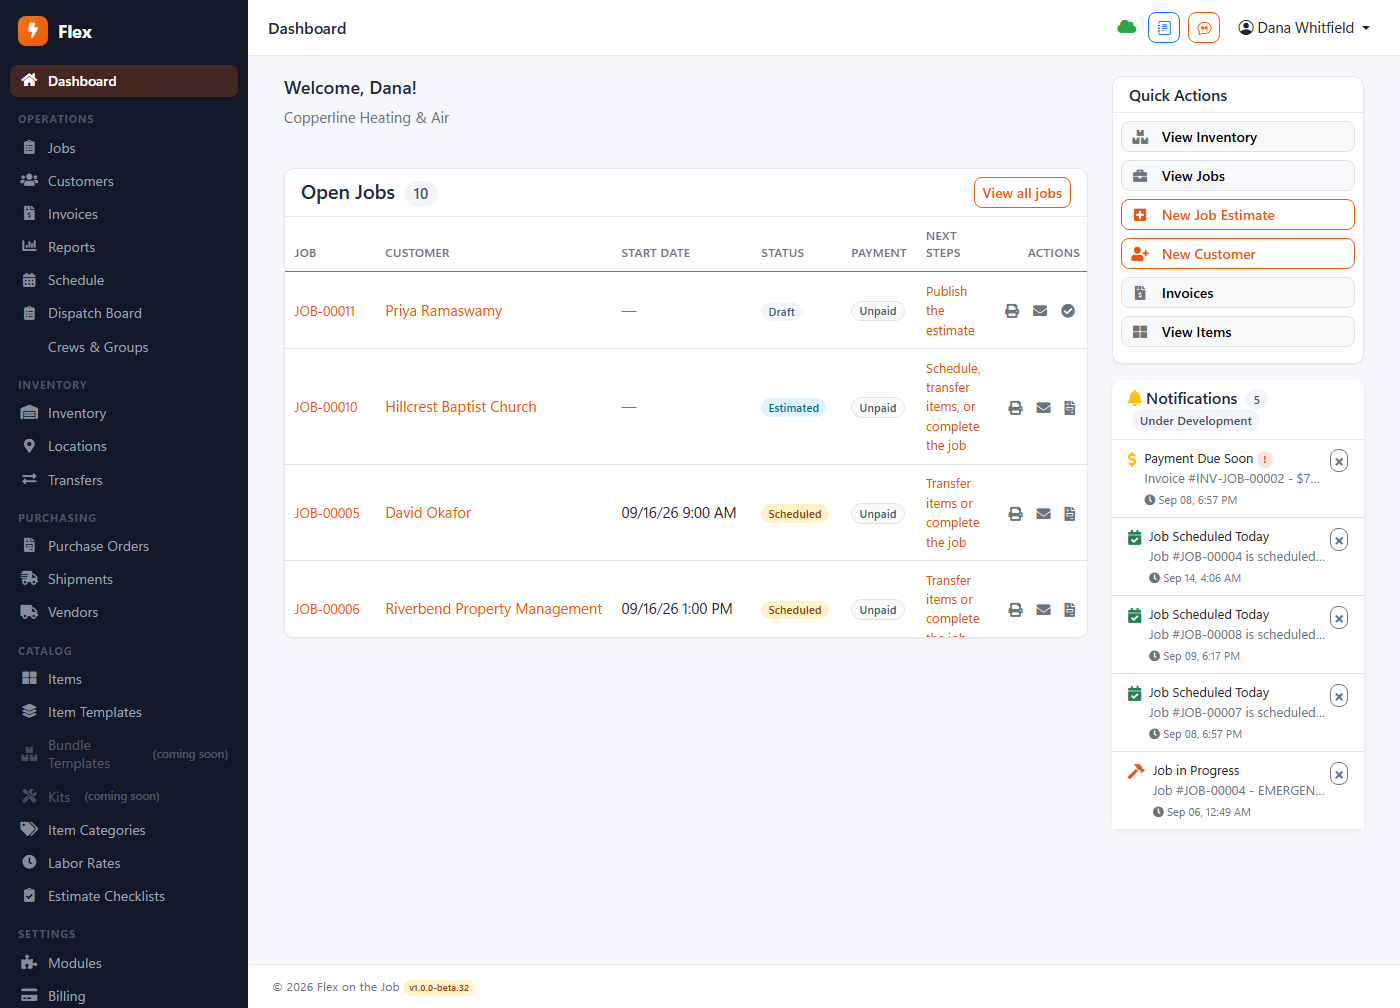
Why it matters: When the dashboard is empty, the company is caught up. That's the whole design — you don't need reports to know where you stand.
Add your first customer
Where: Customers → New Customer
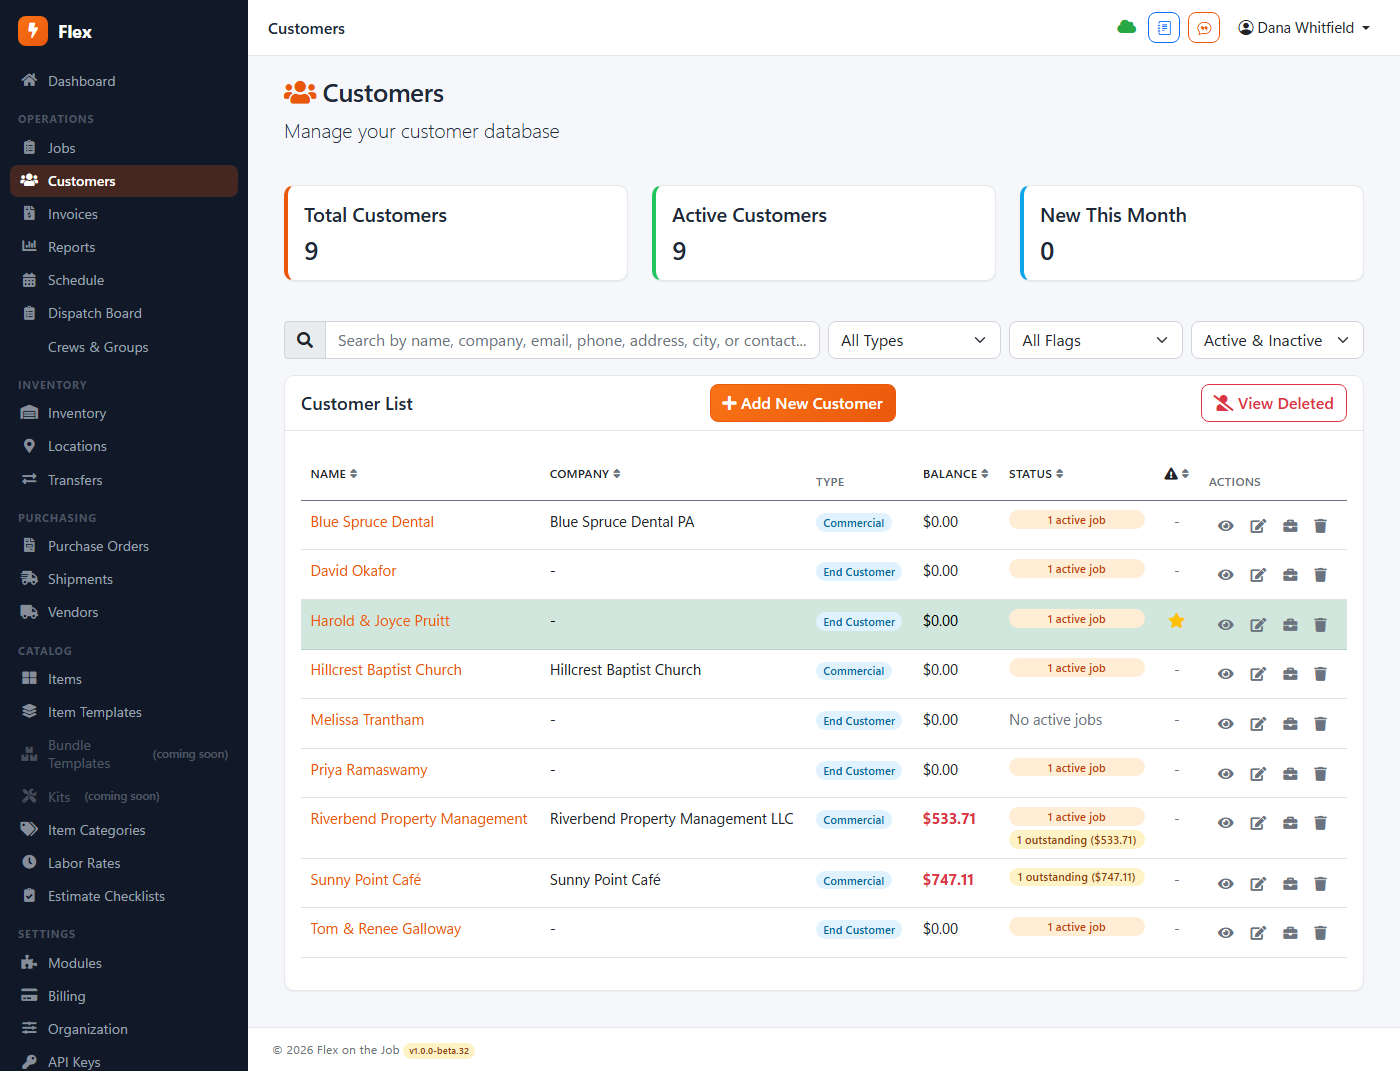
A customer is a company or a household; both have contacts, addresses and a job history. Fill in the name and whatever you have today — phone, email, service address. You can add the rest when they call back.
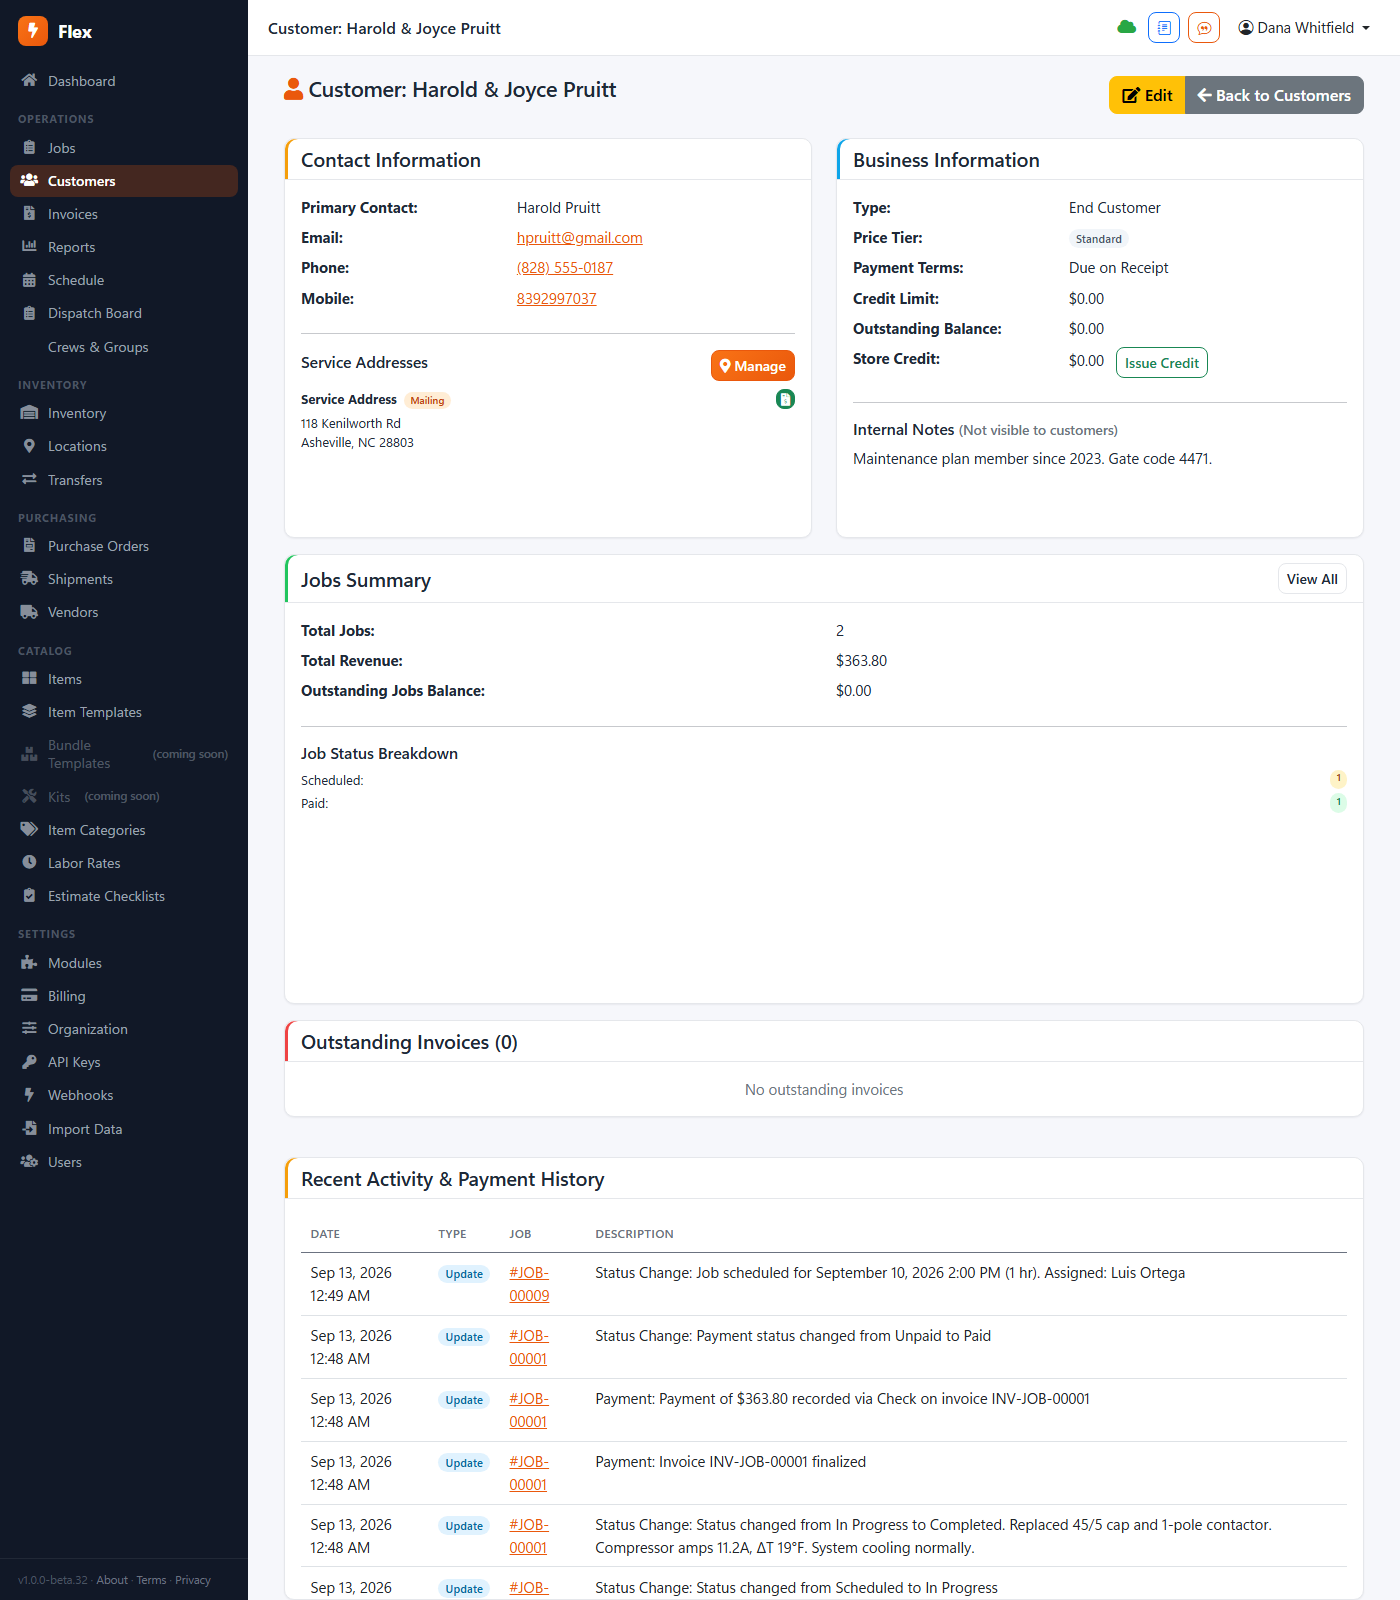
Open a customer to see everything about them on one page: jobs, invoices, payments, the running balance, and the notes your office has left over the years.
Have a customer list already? Customers → Import takes a spreadsheet. Or let us bring it over — see Support.
Write a job
Where: Jobs → New Job, or the New Job button on a customer's page
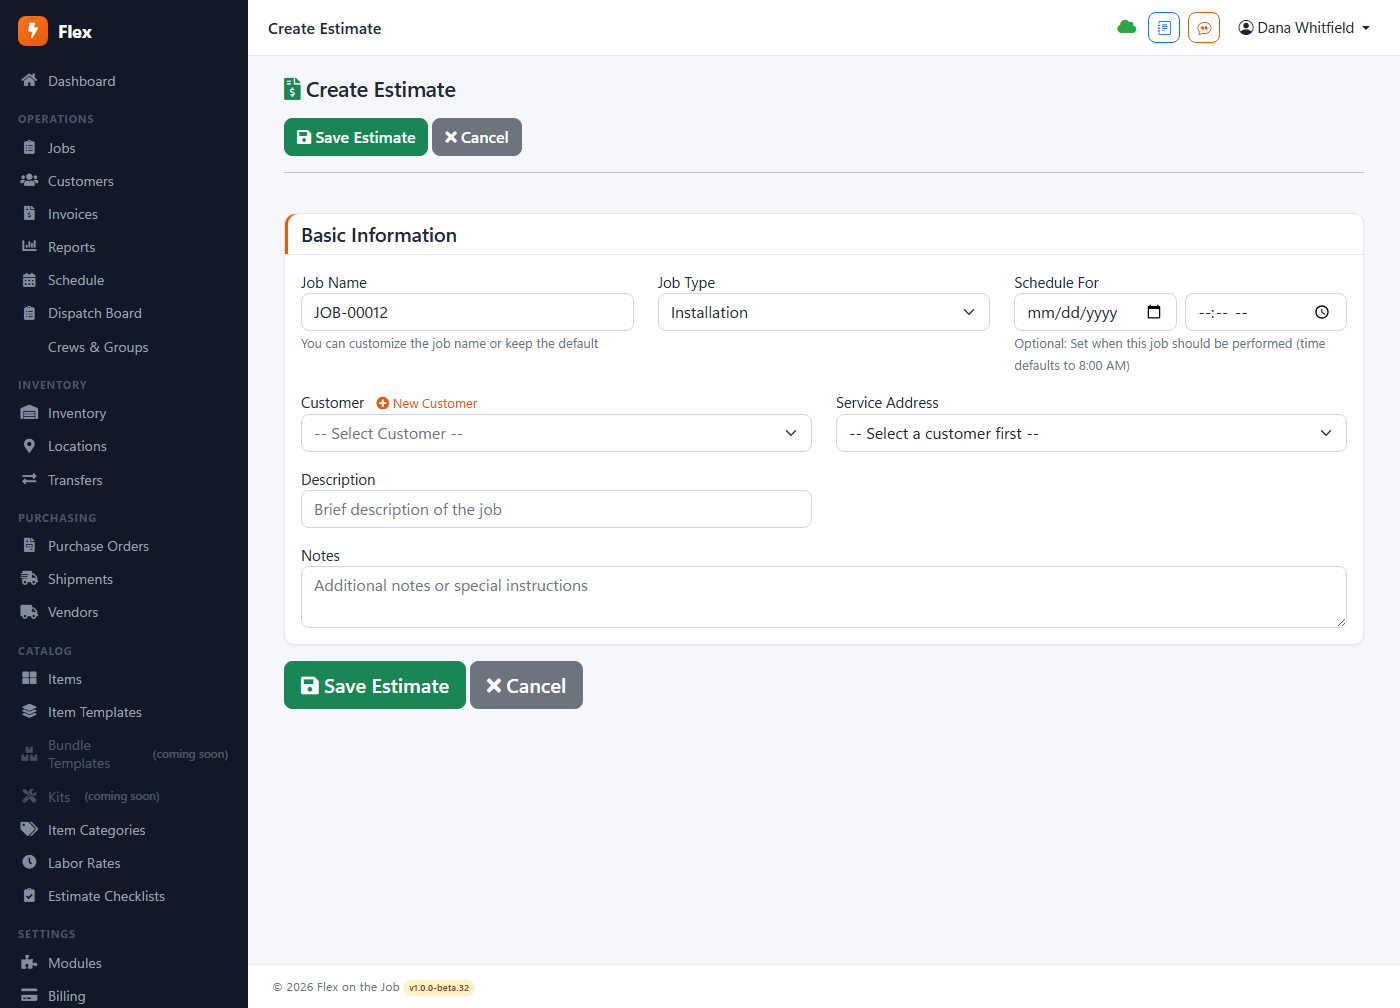
A job is the unit of work in Flex: who it's for, what's wrong, where it is, who's going. Pick the customer, choose a job type (repair, install, maintenance…) and describe the problem in plain words. That description follows the job everywhere — onto the schedule, the tech's phone and the invoice.
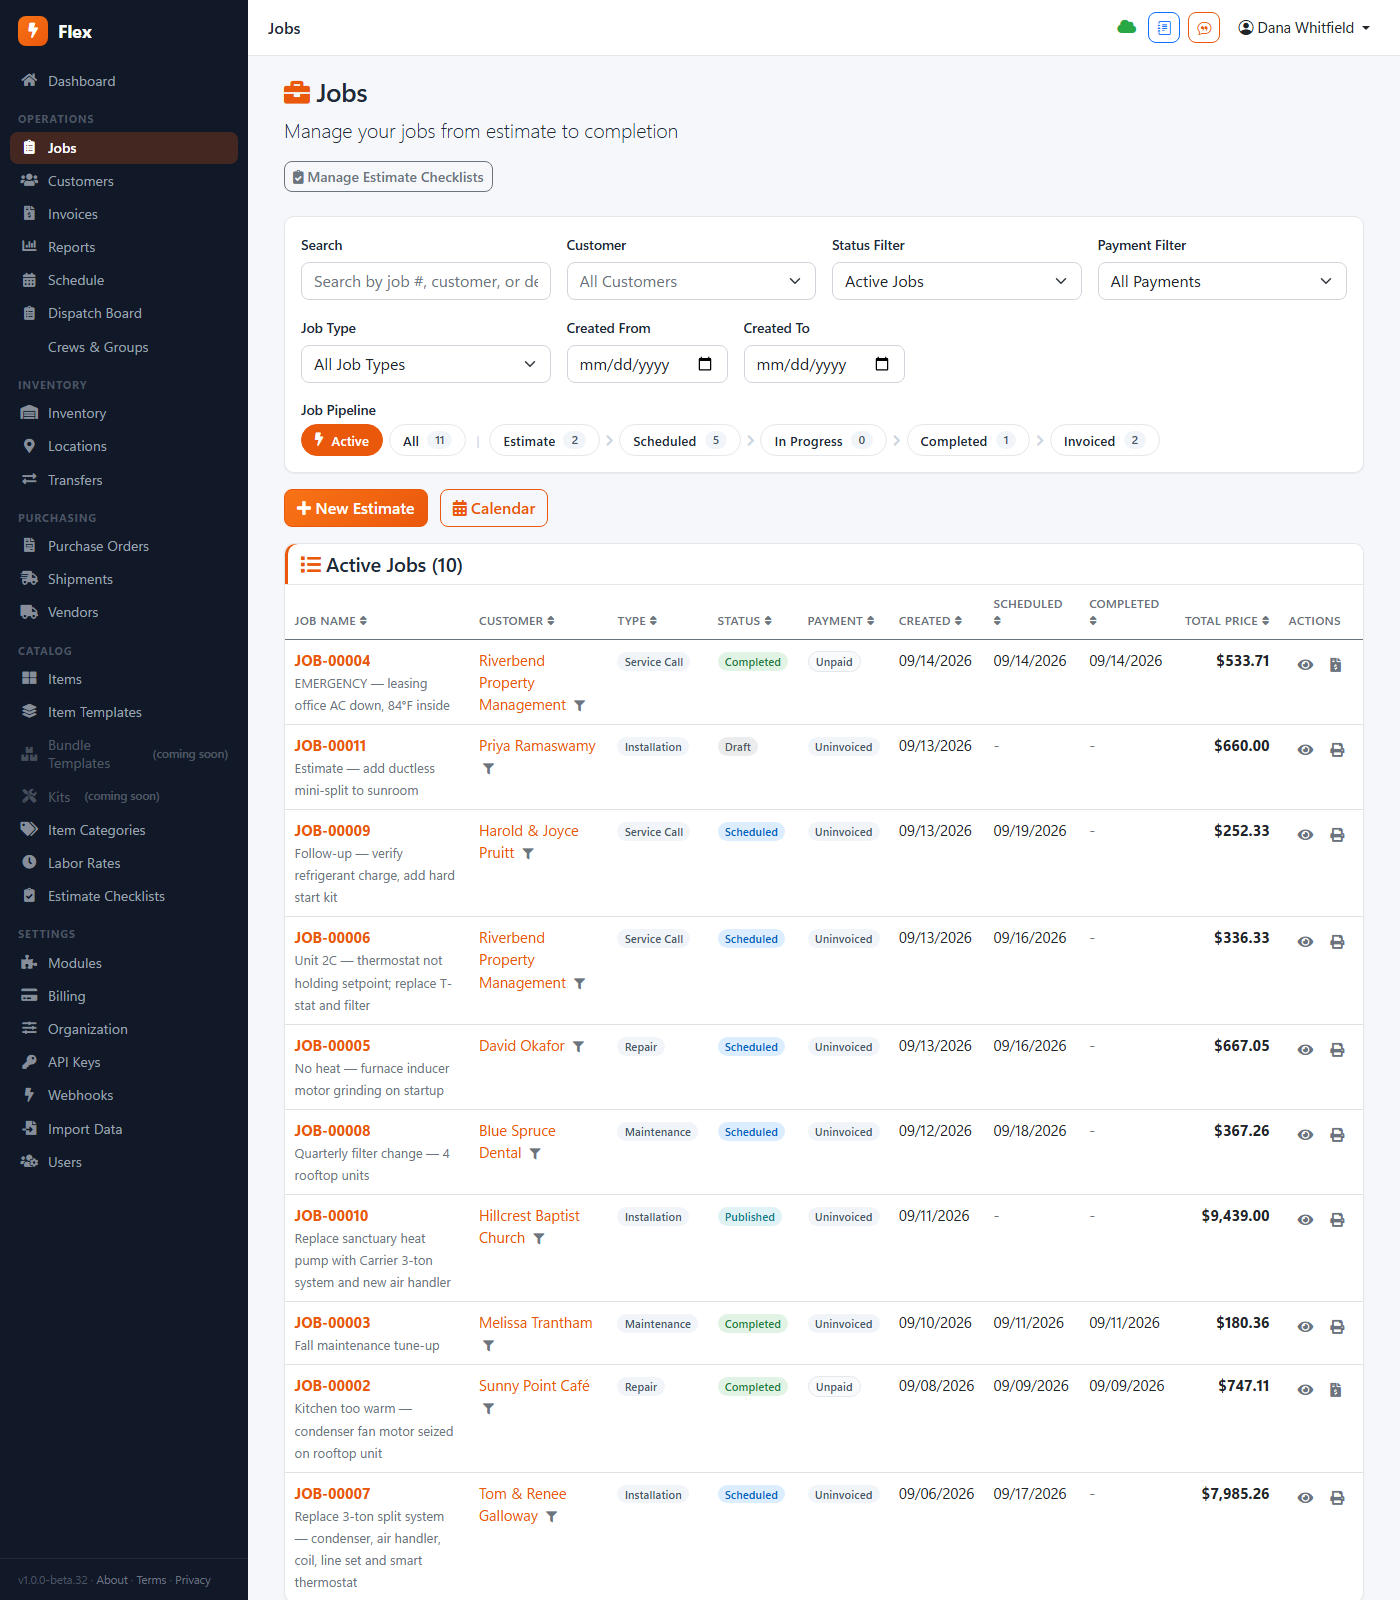
Jobs move through statuses — Estimate, Scheduled, In Progress, Complete, Invoiced — and the jobs list groups them that way, so the list is the status board.
The job page
Where: Jobs → any job
Everything about one job lives on its page: the customer and address at the top, the line items (parts and labor) in the middle, the financial summary at the bottom, and photos, notes and history down the side. Add lines by picking from your catalog or typing them in — either works, and typed lines can be saved to the catalog later.
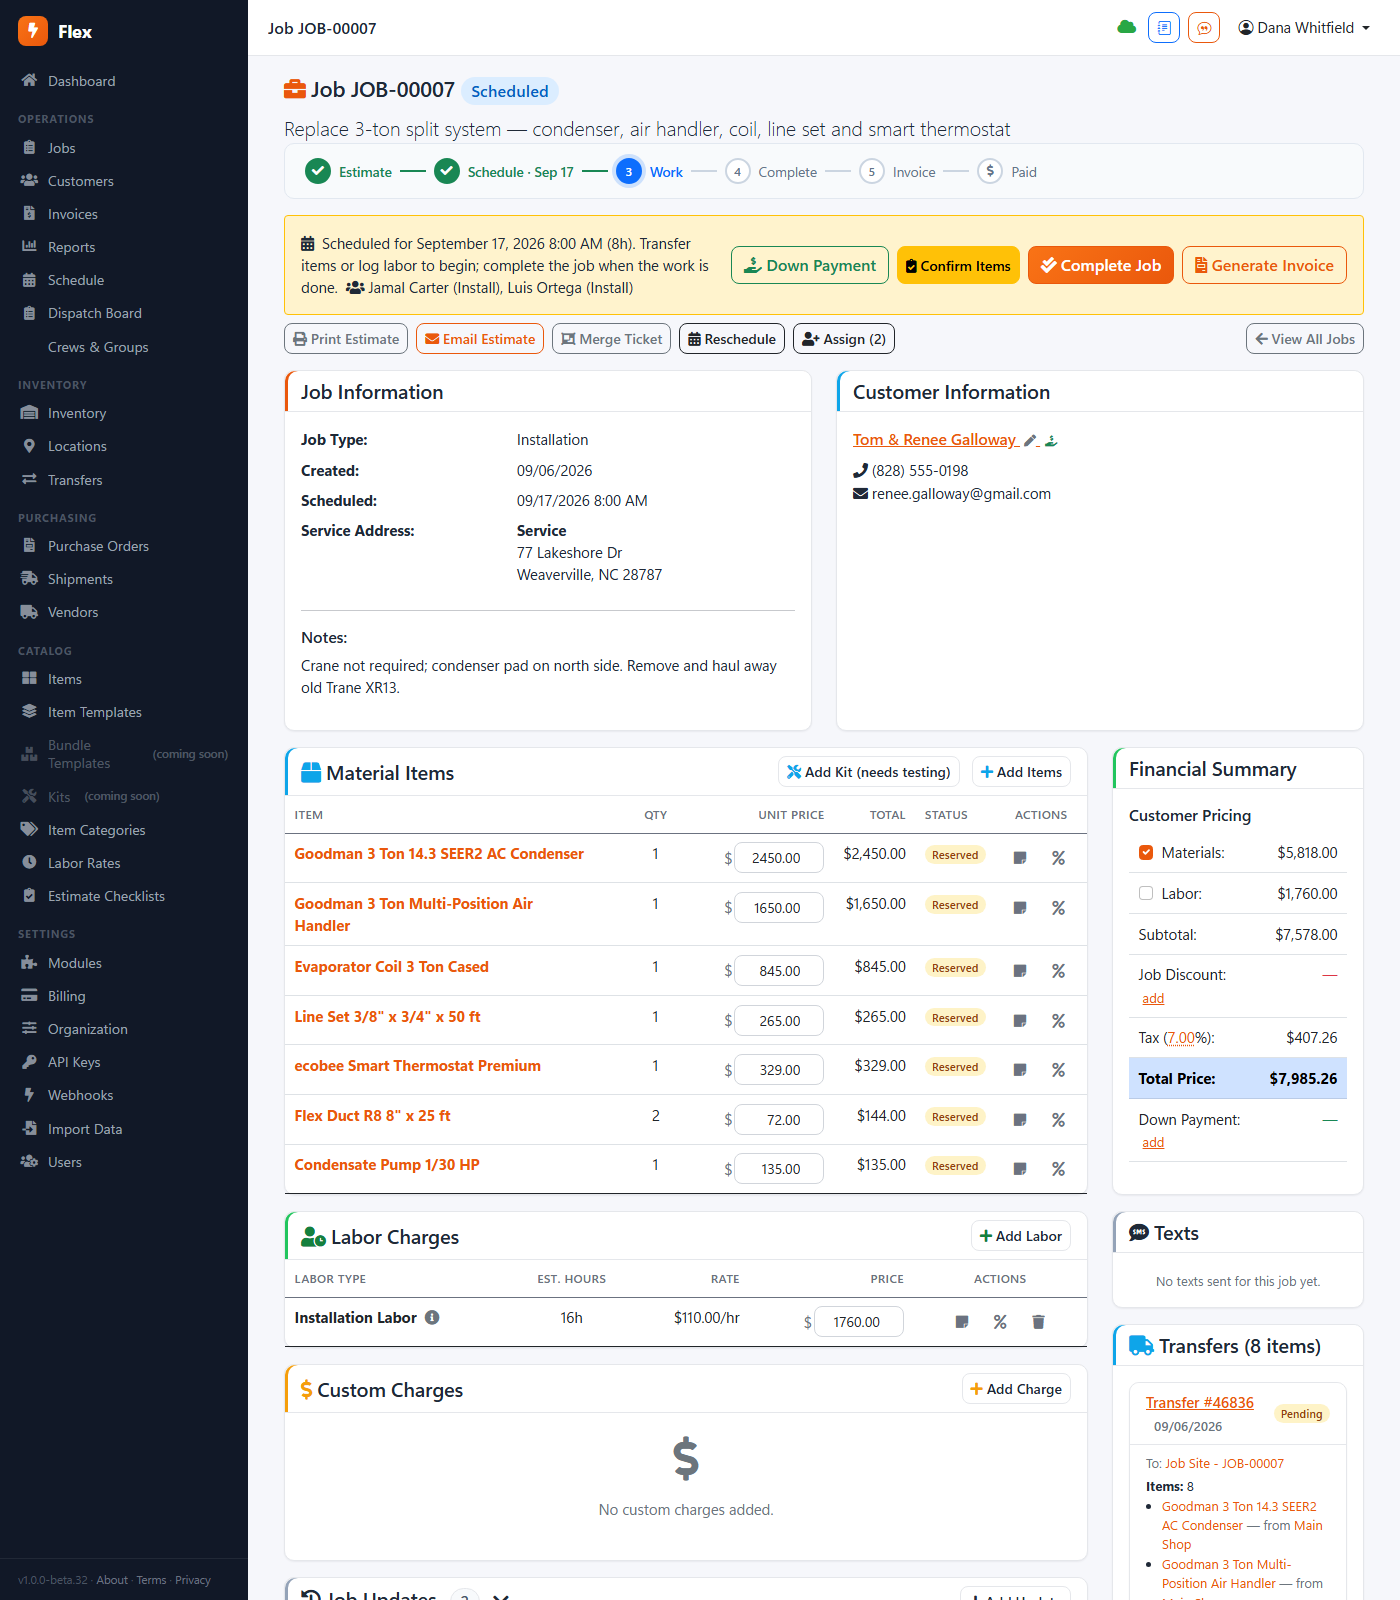
Estimates are jobs. There's no separate estimate screen. A job in Estimate status is the estimate — send it, the customer approves, and the same record becomes the work order with nothing retyped.
Schedule it
Where: Schedule — the calendar; or the Schedule button on the job
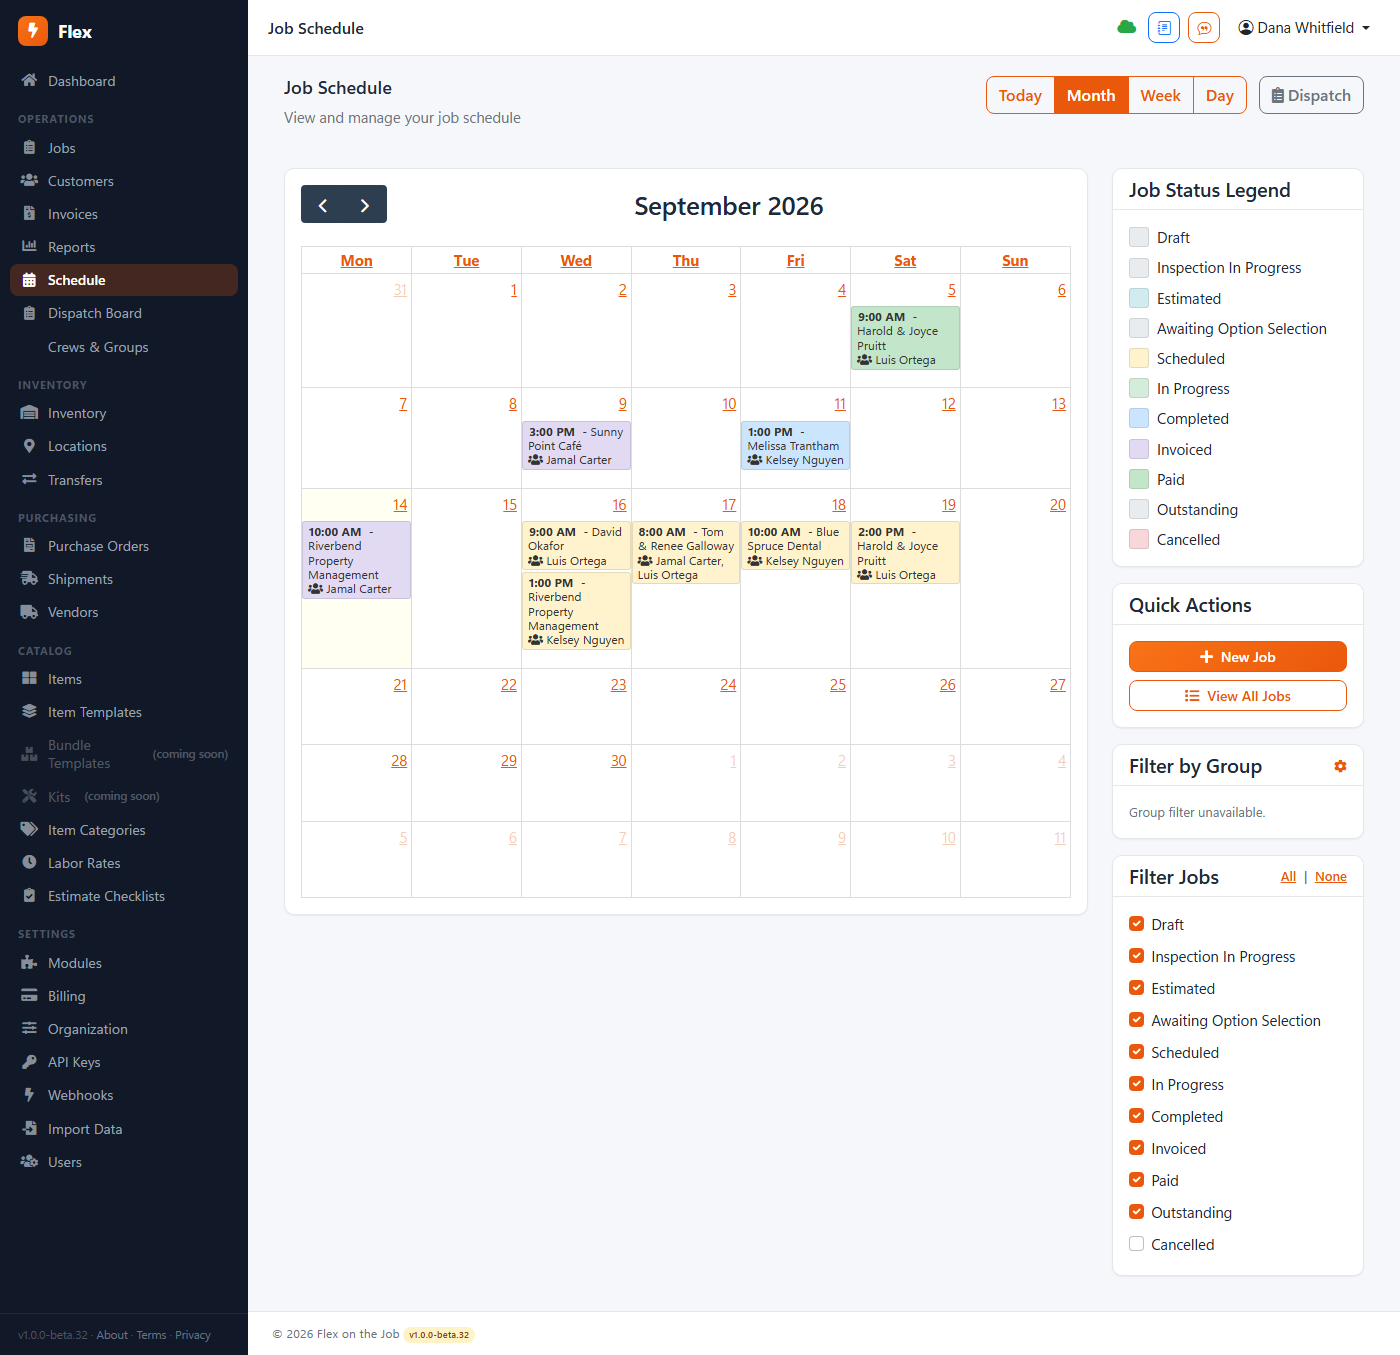
Drag a job onto a day and a tech. The schedule is a week view of your crew; every block is a job, and every job has a duration you can stretch. Double-booking is allowed but shown, so you decide.
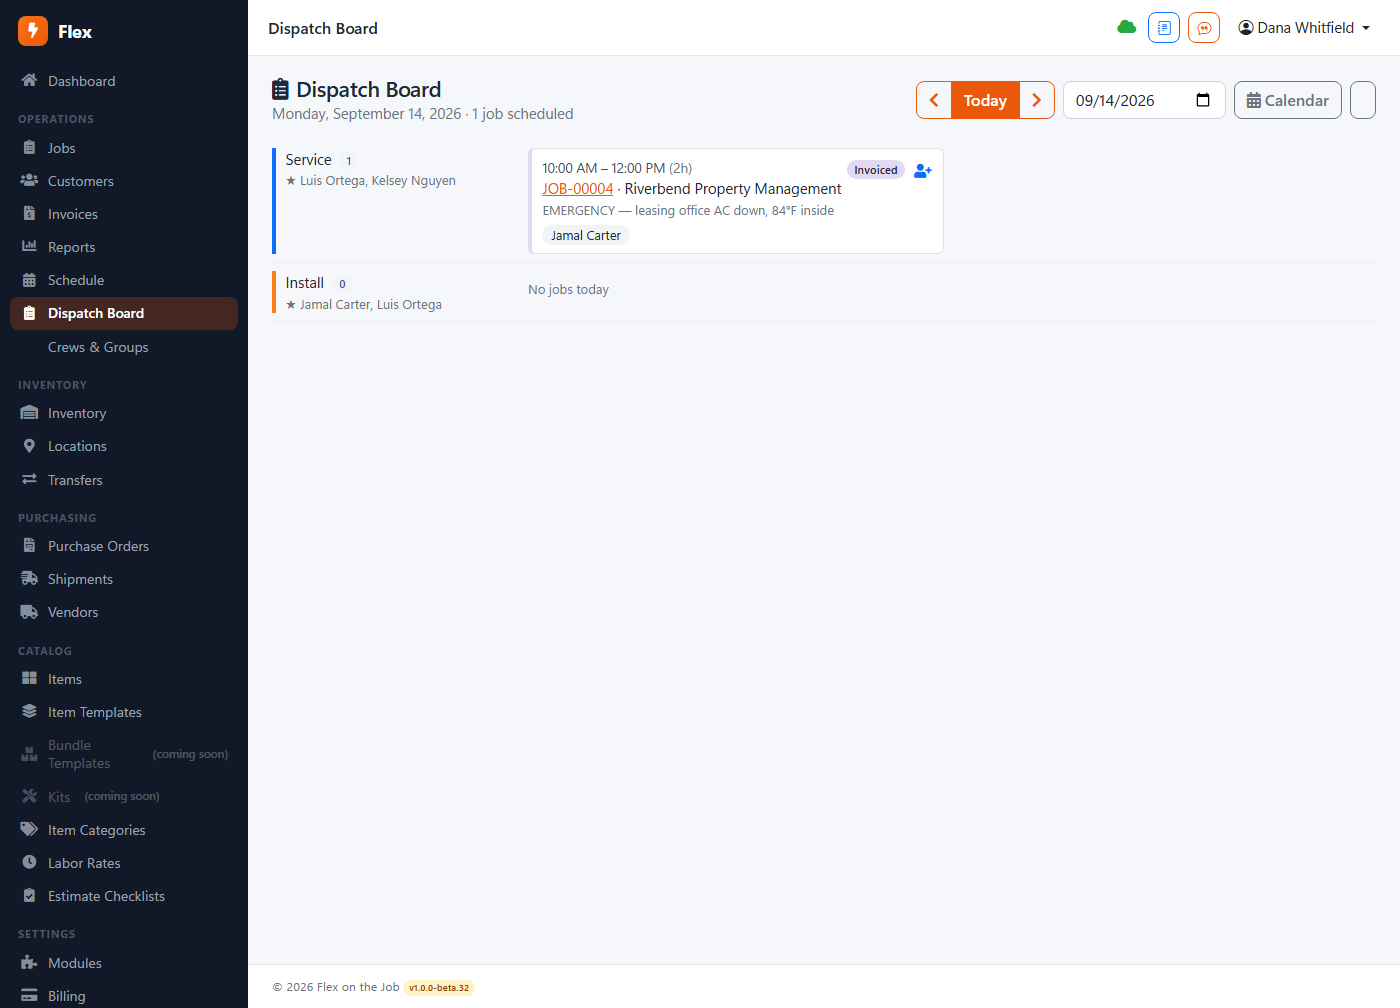
Dispatch the day
Where: Dispatch — the day board
Dispatch is today, by tech, in order. Reorder stops, move a job between techs, see who's running late. When a tech starts a job on their phone, the board shows it. This is the screen the office keeps open all day.
Build your catalog
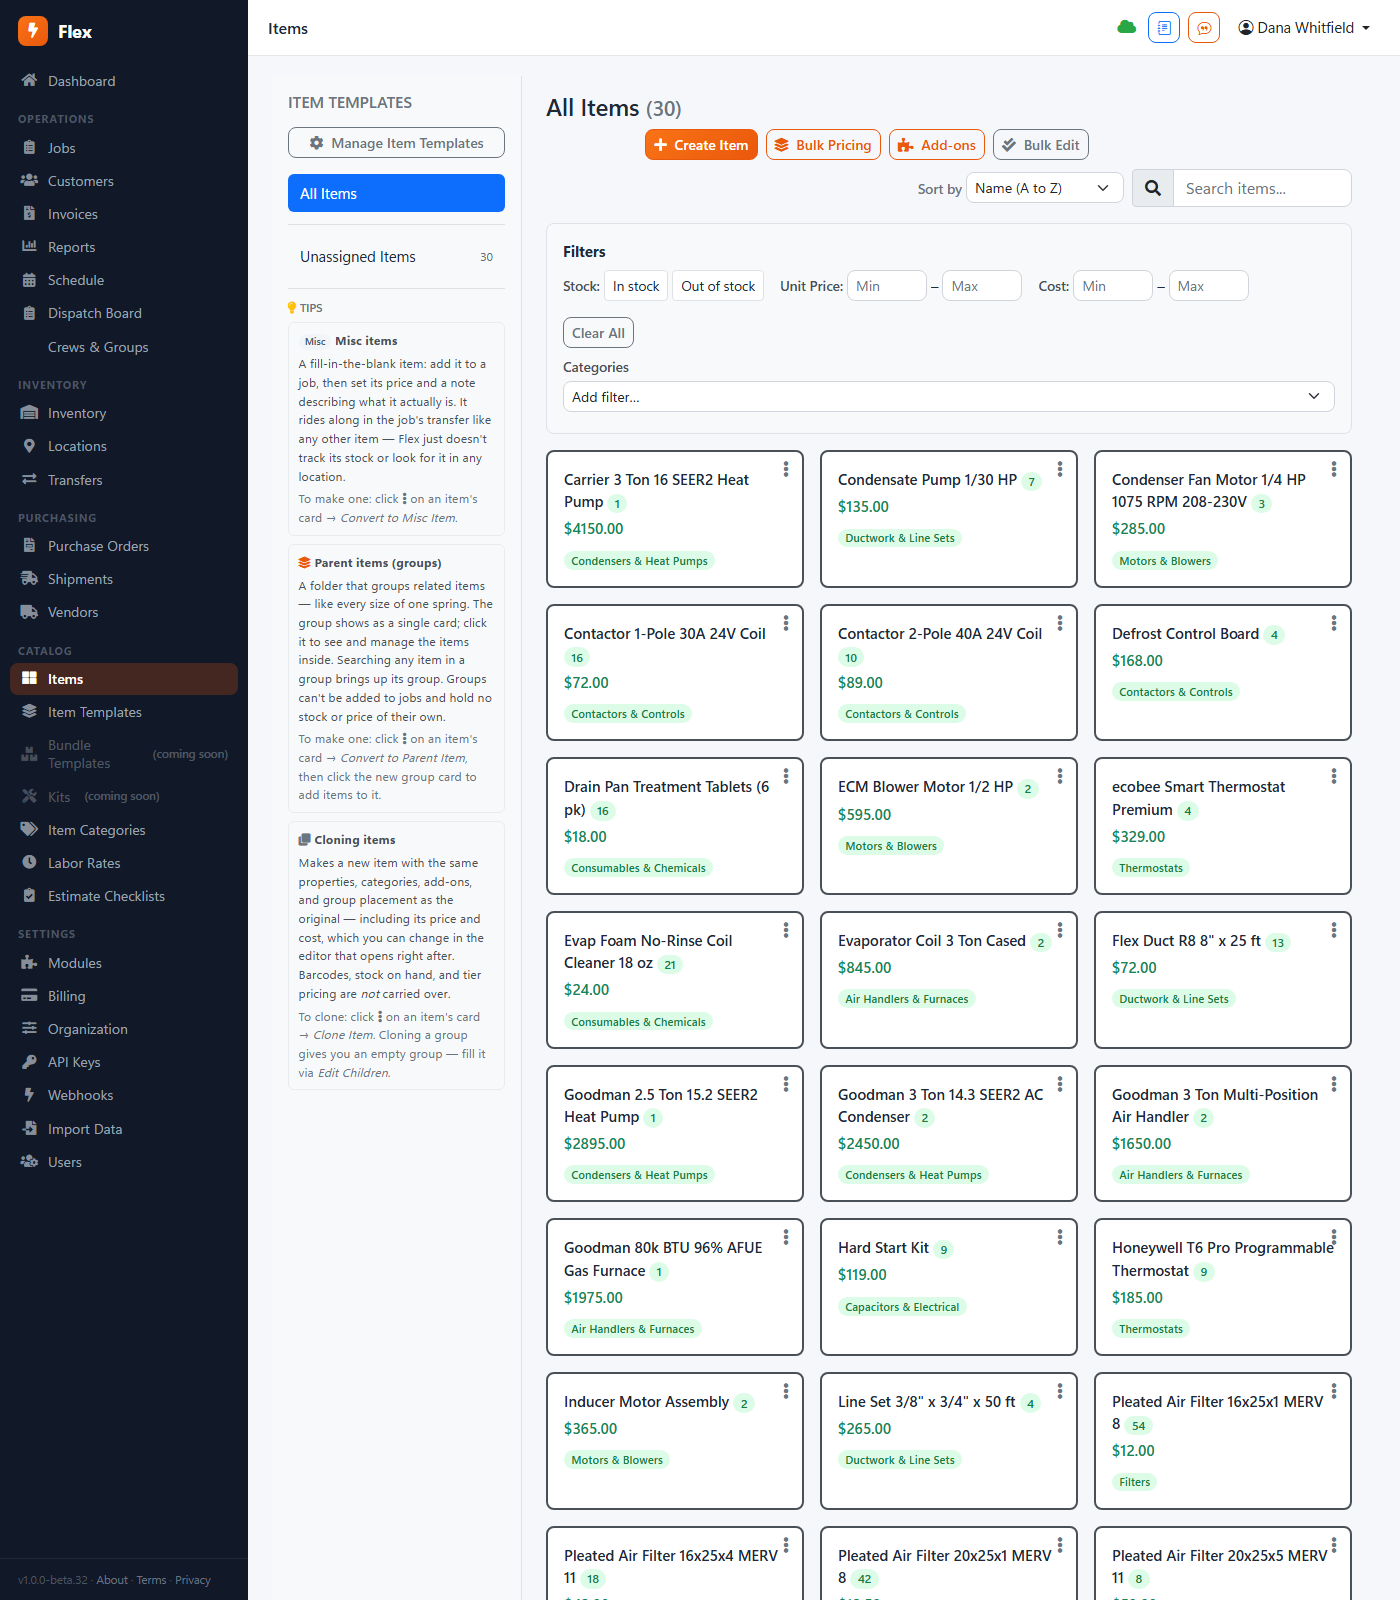
Where: Items
Items are the things you sell — parts, materials, services, flat-rate tasks — with a cost, a price and a category. Once an item exists, adding it to a job is a search and a click, and its price is right every time. Start with your fifty most common lines; add the rest as they come up.
Bundles group items that always go together — a capacitor swap is the part plus the labor plus the trip charge. Add the bundle and all three lines appear.
Track stock (optional)
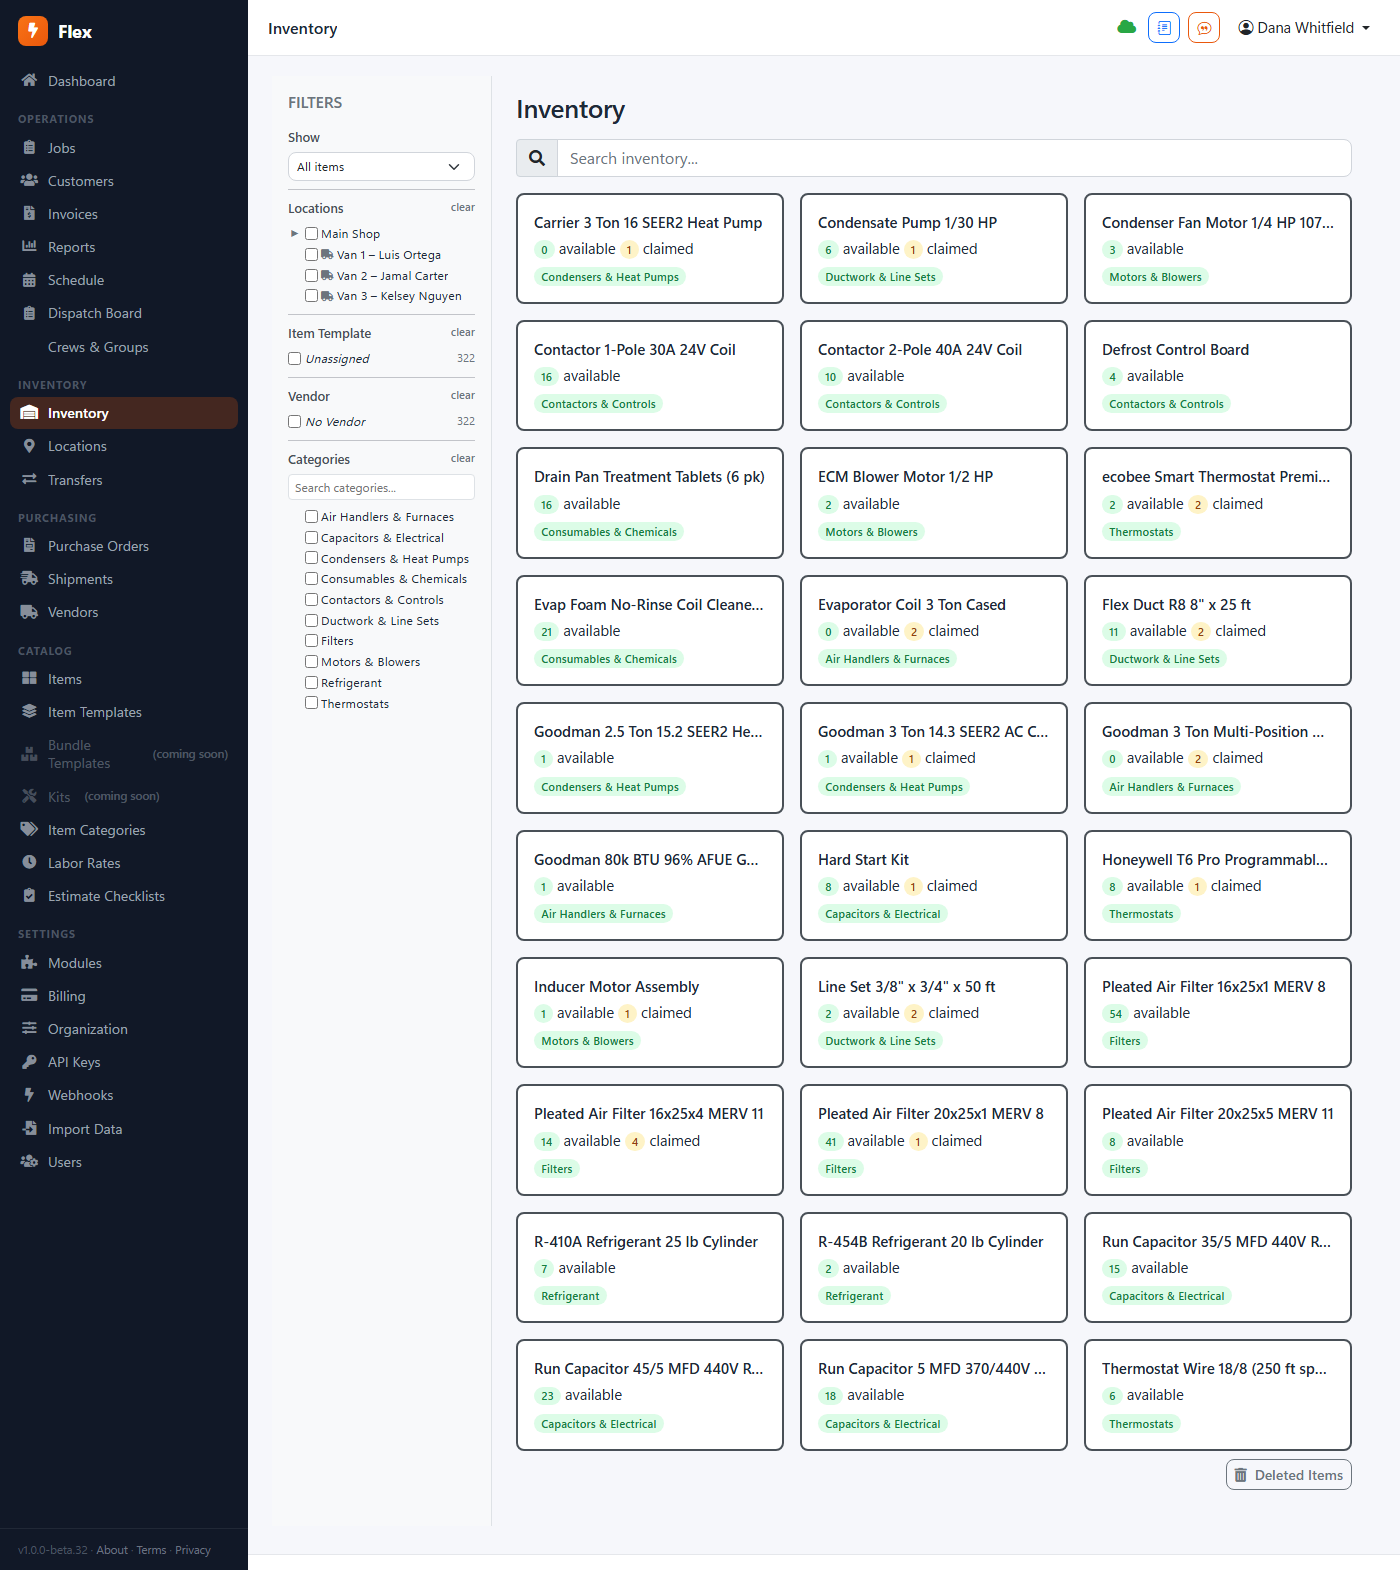
Where: Inventory
If you keep parts on trucks or shelves, turn on inventory. Every location — each van, the shop, the warehouse — has its own quantities, and using a part on a job takes it out of the location it came from. Set a reorder point and the dashboard tells you when to buy.
Don't need it? Skip it. Inventory is off until you add a location. Items still work as a price list; nothing about jobs or invoicing depends on stock.
Invoice the job
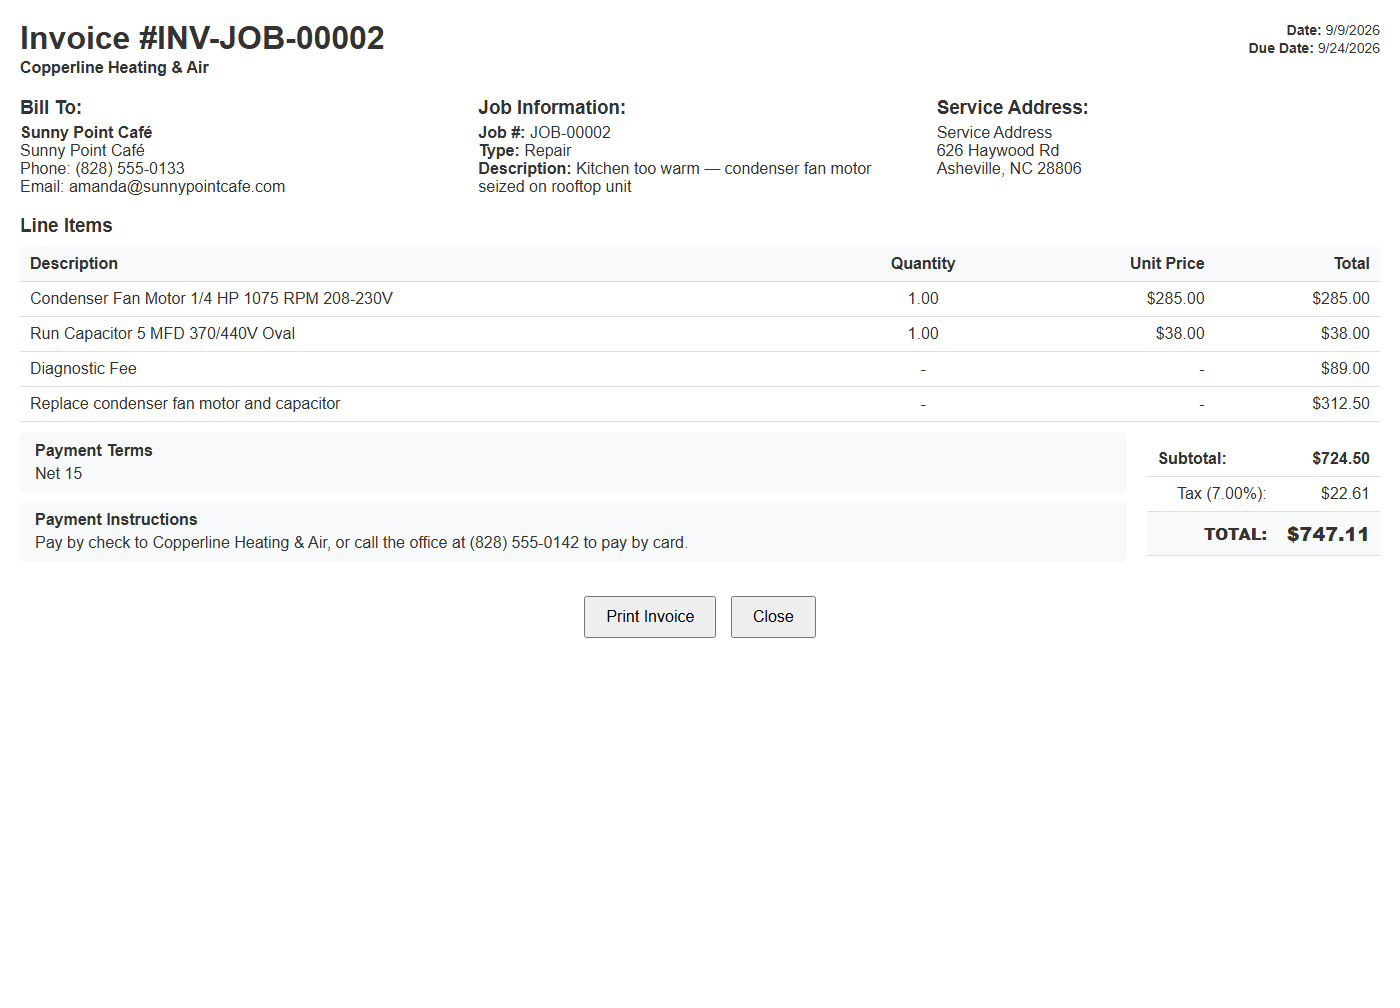
Where: The Invoice button on a completed job
When the job is done, one click turns it into an invoice: same lines, same customer, same tax. Adjust anything before you send. Send by email from Flex, print it, or hand the tech a PDF on their phone.
Take the payment
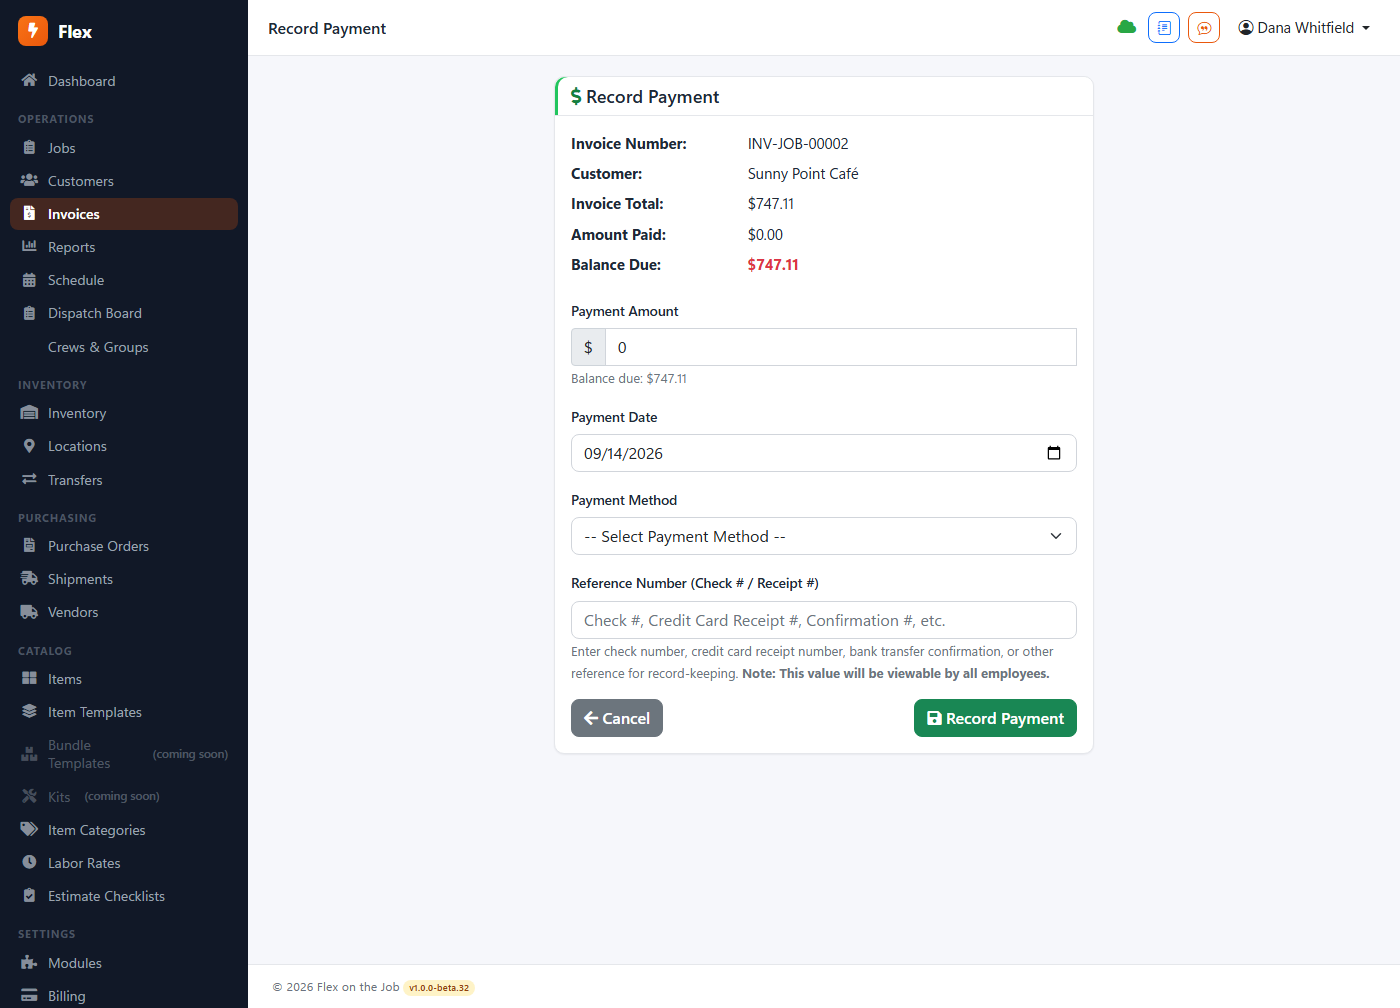
Where: Record Payment, on the invoice
Record cash, check, card or ACH against the invoice. Partial payments are fine — Flex tracks the balance and the customer's page shows it. With card processing turned on (Modules → Payments), the emailed invoice carries a Pay now link and the payment records itself.
Watch the money
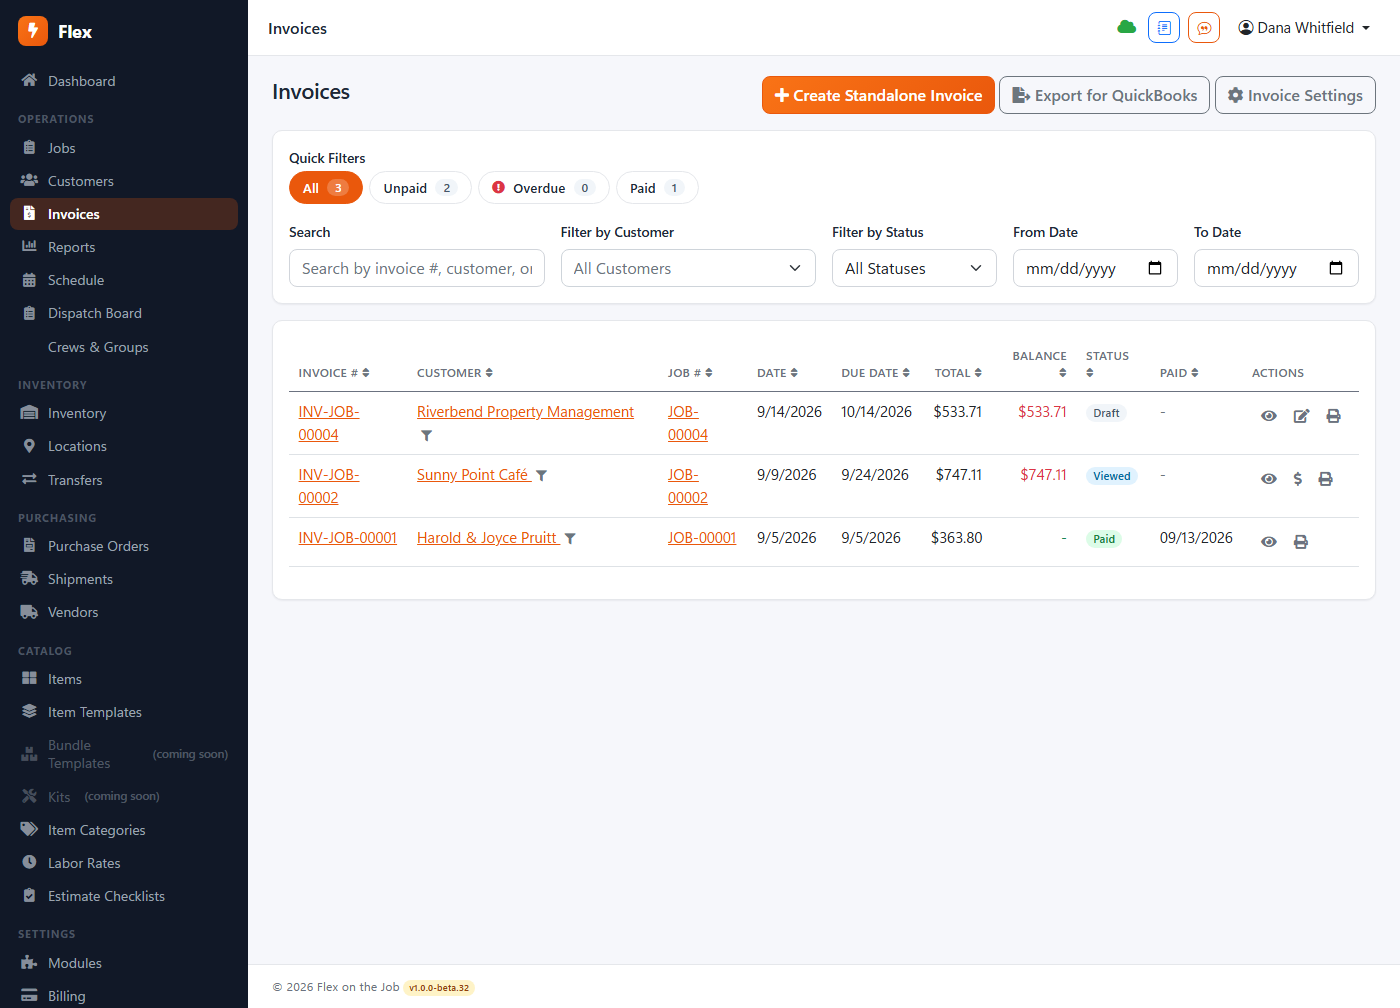
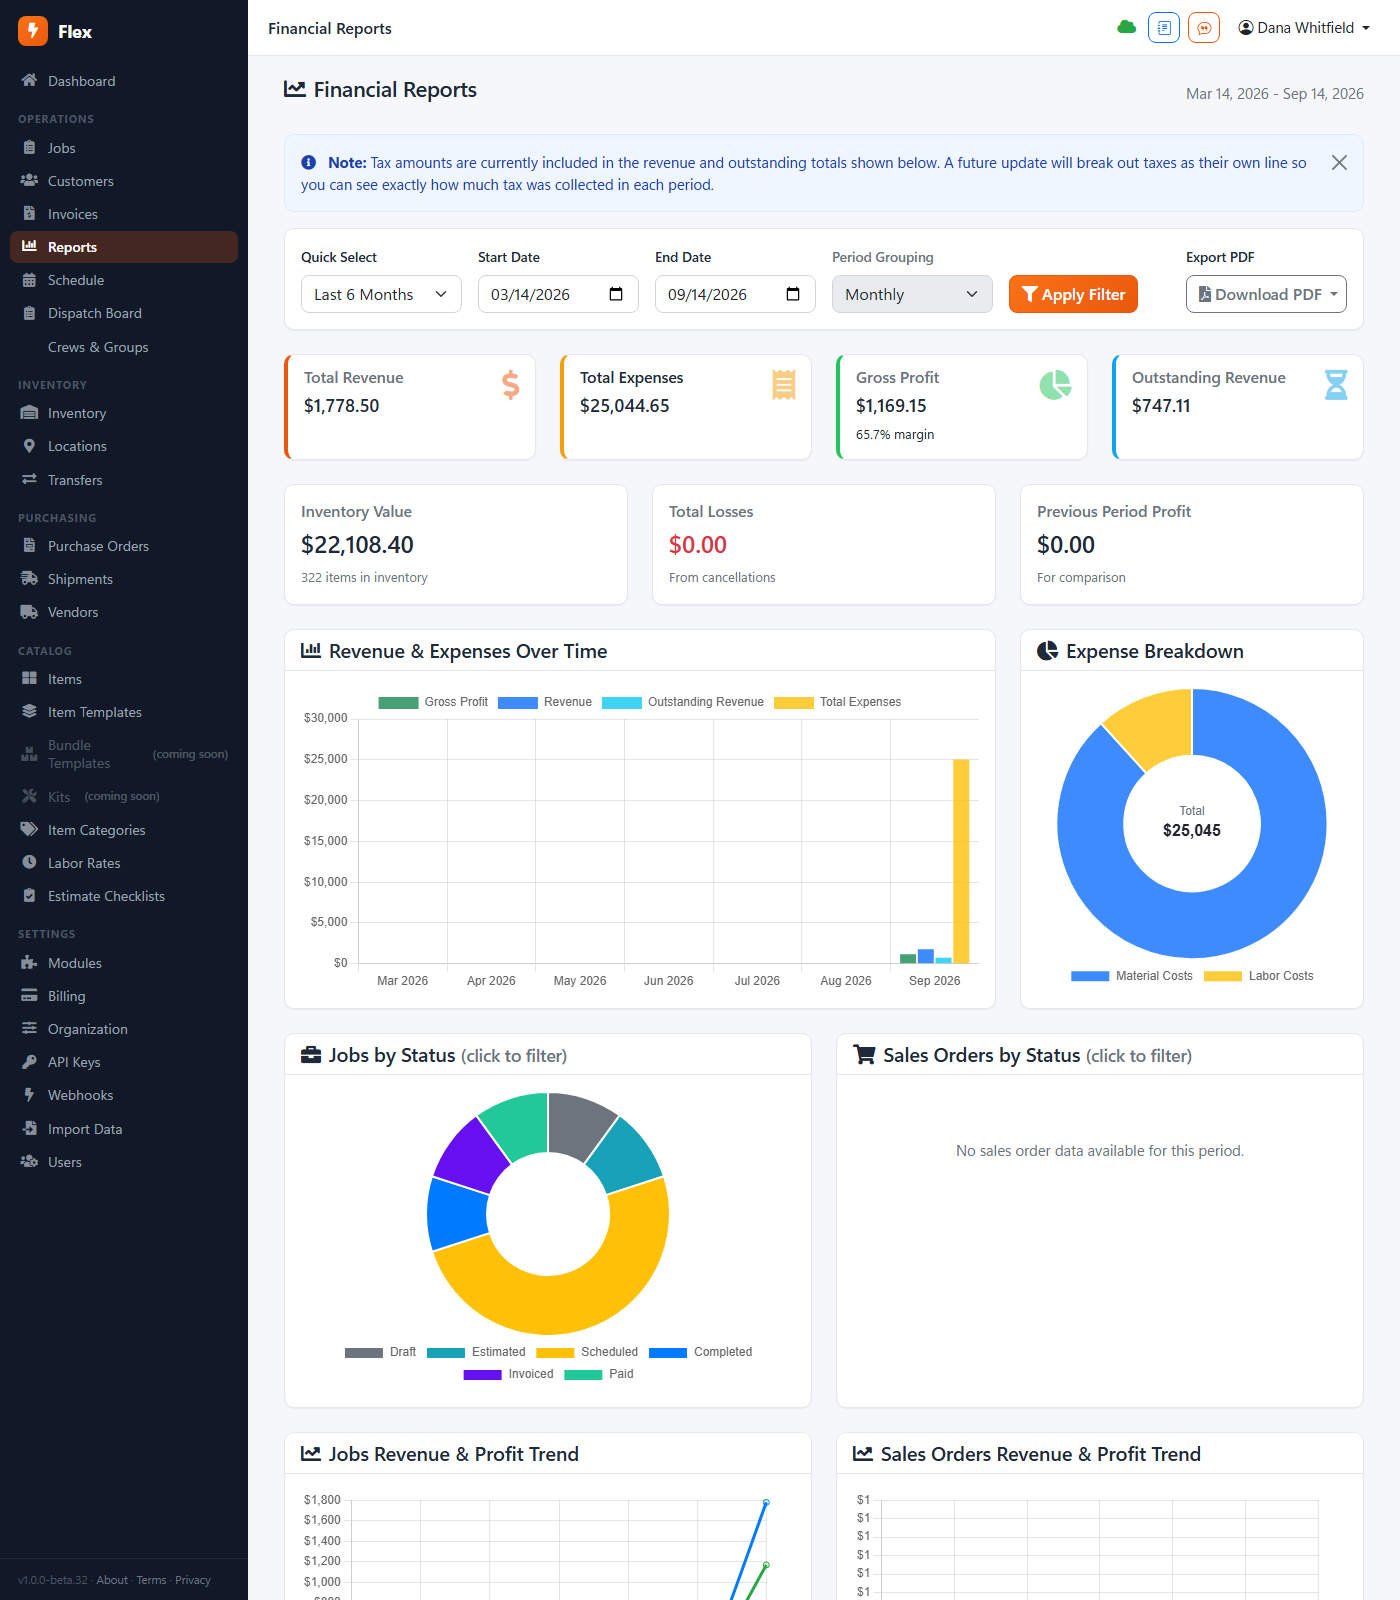
Where: Invoices — the list; Reports — the totals
The invoice list is your receivables: who has paid, who hasn't, and how overdue they are. Reports roll that up — revenue by month, outstanding balances, what your jobs actually earned once parts and labor came out.
When you get stuck
Search this help (the box at the top left works across the guide and the full manual), or email support@flexonthejob.com — a person answers. If you'd rather someone set things up with you, a support block buys a few hours of exactly that.
Rather have us do it?
Buy a 4-hour support block and a real person sets up your catalog, imports your customers, trains your crew, or just answers the phone when you're stuck.